Summer Garden Frittata

This SCREAMS summertime to me. Any time I have extra veggies from the garden that I need to cook up before they expire, this is the easy go-to dish. You can use any variety of veggies and cheeses you like. Stick to the basic formula and you have a winning dish any day!

Summer Veggie Frittata

Print Recipe
Serves: 4 Cooking Time: 45 minutes

Ingredients

  • 1 Tbsp Extra Virgin Olive Oil
  • 1 cup diced Zucchini
  • 1 cup chopped fresh Kale
  • 1/2 cup diced onion
  • 1/2 cup diced tomatoes
  • 1/4 tsp Greek seasoning
  • 8 large eggs (for 12-in skillet, 6 eggs for 9-in)
  • 1/4 cup milk (any kind)
  • 1/8 tsp smoked paprika
  • 2 cloves garlic, minced
  • 1/4 tsp salt
  • Freshly cracked black pepper (3-4 turns)
  • 1/2 cup cheese of choice (shredded Colby, cheddar or feta crumbles work great!) *for mine I did all over cheese and 1/2 feta, since hubby is not a fan of feta, lol)

Instructions

1

Preheat oven to 400. Heat skillet over medium heat, add oil. Add onion, zucchini and kale to pan and sauté until tender, about 5 minutes. Add tomatoes, cooking and stirring 2 minutes. Add seasoning. Taste, then season to taste. Space out veggies evenly in skillet.

2

Meanwhile, in separate bowl whisk eggs, milk, garlic and paprika until well blended. Pour egg mixture over veggies. DO NOT STIR. Gently shake skillet to distribute the egg mixture. Add cheeses of choice on top.

3

Bake in oven 15-20 minutes, until eggs are set and edges are golden brown.

4

Serve with side of breakfast potatoes, bacon and sparkling mimosa for a home-run brunch!

Notes

*It is best to rest for 20-30 min before serving, but can enjoy straight out of the oven, too! **I love this with fresh salsa or Tabasco hot sauce as well!

Savory Hot Beef Sandwich

This savory Hot Beef Sandwich is the ultimate go-to for any filling, Game night or Sunday night meal ready to feed all that are hungry for that ultimate bite! Preparing is just a few minutes, then let the pot take over and have supper ready while you kick back and relax. You can always add Worcestershire for more earthiness, red pepper flakes for heat and/or some rice wine vinegar for some umami. Even better the next day as all those juices marinate with the delicious meat. Use this as your base and add what you like to make it your own. Enjoy!!!

Savory Hot Beef Sandwich

Print Recipe
Serves: 6-8 Cooking Time: 5 1/2 hrs (including prep time)

Ingredients

  • 2-3 Pounds chuck roast
  • Salt & Black pepper
  • 3 Tbsp unsalted butter
  • 2 Tbsp canola (or any vegetable) oil
  • 2 Cups beef broth/stock
  • 1 Tbsp minced fresh rosemary
  • 8 ounces (1/2 16 oz. jar) pepperoni in juice
  • 1 yellow onion
  • 6-8 hoagie/sausage roll buns, toasted with garlic butter

Instructions

1

Sprinkle the chuck roast with plenty of salt and pepper, seasoning all sides.

2

Heat oil and 2 Tbsp butter in Dutch oven or heavy bottom pot over high heat. Add meat, browning all sides, about 5-6 minutes. (I had to cut my roast in half and brown in 2 batches)

3

Pour in the broth along with 1 cup of water. Add rosemary then the pepperoncinis and their juices (about 1/2 cup). Bring to boil, reduce to simmer.

4

Cover and simmer until meat is falling apart, 4-5 hours.

5

Caramelized onions: Heat cast iron skillet on low-medium with remaining 1 Tbsp butter. Add sliced onions. Sauté slow and low until golden brown. Add pinch or two of salt, splash of champaign vinegar (or any vinegar!) and stir 2 minutes. Turn off heat. Set aside.

6

Remove roast and shred with two forks, return to juices.

7

Transfer 1/2-1 cup of roast juices to small pot, reduce on low heat about 10 minutes. Transfer to small cups for serving.

8

Brush rolls with garlic butter (2 Tbsp butter with 1/2 tsp garlic powder in microwave). Toast under broiler until desired brownness.

9

Build: Add heaping serving of shredded beef, cheese of choice (I used Provolone), caramelized onions, peppers and more juice as needed, with juice on the side for dipping. Heaven. Enjoy!!

Beef Stroganoff

This Beef Stroganoff brings back memories of my childhood. My mother made this often, usually with the 70’s version of canned soup and such. Being a single mom and working full time it’s what she could do and it was still very delicious and very filling! So I thought I’d try a homemade version for my own family to try. Turns out it was a hit and there were absolutely no leftovers!! I hope you try this yourself and see how easy, scrumptious and hearty this is! Enjoy!!!!

Beef Stroganoff

Print Recipe
Serves: 6 Cooking Time: 30-45 min

Ingredients

  • 12 ounces whole wheat egg noodles
  • 2 Tbsp salted butter
  • Freshly ground pepper
  • 2 Tbsp olive oil
  • 1 Pound sirloin steak, cut into bite-size pieces
  • Salt & freshly ground Black Pepper
  • 8 ounces cremini mushrooms, cleaned and quartered
  • 2 Large carrots, finely diced (about 1 cup)
  • 1/2 Yellow onion, finely diced (about 1 cup)
  • 1/2 Cup Brandy (optional, can replace this with extra beef stock)
  • 2 1/4 Cups beef broth/stock, divided
  • 2 Tbsp Cornstarch
  • 1/4 Cup sour cream
  • 1 Tsp Dijon mustard (heaping!)
  • Chopped fresh parsley, for garnish

Instructions

1

Noodles: Bring a large pot of water to a boil, add 1/4 cup kosher salt. Add noodles and cook to minimum recommended time, according to package directions. Drain, set aside.

2

Stroganoff: Heat 1 Tbsp olive oil in skillet on high heat. Season meat with salt and pepper, tossing to fully coat.

3

Add half the meat to skillet, browning both sides. About 5 minutes each batch. Transfer to plate, set aside. Repeat for second batch.

4

To the same pan add 1 Tbsp olive oil and add mushrooms, onions, carrots and cook until lightly browned, about 5-7 minutes. Turn off heat.

5

Add Brandy and 2 Cups of the stock. Turn heat back on, bring to boil then lower to simmer for 2-3 minutes.

6

Mix the cornstarch with the remaining 1/4 c. Stock, whisk out all the lumps. Pour slurry to skillet and cook to thicken, about 5 more minutes.

7

Turn off the heat. Stir in the sour cream, mustard and beef (with all the juices). Season with salt & pepper to taste.

8

For the Noodles: melt butter in pan, add noodles and freshly cracked black pepper. Toss to coat.

9

Transfer to bowls the noodles then beef and sauce, sprinkled with the parsley.

10

Enjoy!

Notes

Again, if you prefer not to use Brandy, just use extra beef broth. Remember to taste as you go along and season as needed to your own taste!!!

Easy & Hearty Taco Soup

This is my easy, no-fuss, taco soup. Perfect for this fall weather! I was wanting to make something quick but hearty and warming to the soul and tummy. I had everything in my pantry but no meat! I suppose I could’ve doubled my beans and made it vegetarian. But luckily my game-cooking hubby happened to have some ground pheasant in the freezer! So I just substituted that for the ground beef or chicken I normally would’ve used. This recipe is very versatile and a good base to create your own flavors as well. You can add a can of Rotel instead of tomatoes, or use fresh tomatoes. You can use green bell pepper if you want to omit the jalapeño. You can basically pick and choose what you like and use this as a guide. Anyway you make it, it is bound to be a family favorite and a great go-to any night. Enjoy!

Easy & Hearty Taco Soup

Print Recipe
Serves: 6-8 Cooking Time: 30-45 min

Ingredients

  • Taco Seasoning:
  • 1 tsp ground cumin
  • 1 tsp ground paprika or ground smoked paprika
  • 1 Tbsp chili powder
  • 1 tsp salt
  • 1/2 tsp ground pepper
  • 1/2 tsp oregano
  • 1/4 tsp red pepper flakes (more or less to taste)
  • Taco Soup:
  • 1 Pound lean ground beef, chicken or turkey
  • 1 Tbsp Olive Oil (or vegetable oil)
  • 1 Small yellow or vidalia onion, diced
  • 1/2 Red bell pepper, diced
  • 1/2 Yellow bell pepper, diced
  • 1 Large jalapeño, seeded and diced
  • 16 ounces black beans, drained and rinsed, divided
  • 1 Cup whole corn kernels
  • 1 Can roasted tomatoes, diced
  • 3 Cloves garlic, minced
  • Taco Seasoning (recipe above)
  • 2 Cups beef broth

Instructions

1

Combine all the ingredients for the taco seasoning. Set aside.

2

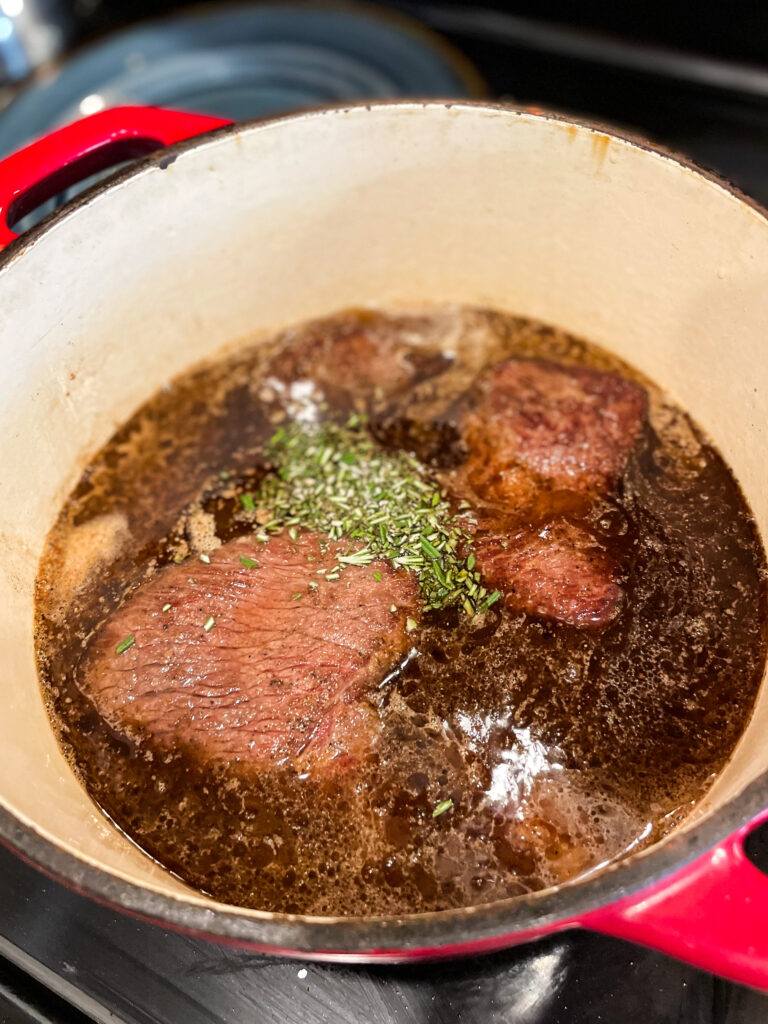
In Dutch oven, or heavy bottom pot, heat the oil, then add the ground meat, breaking it up as you go until browned. Sprinkle some of the taco seasoning into the meat and stir.

3

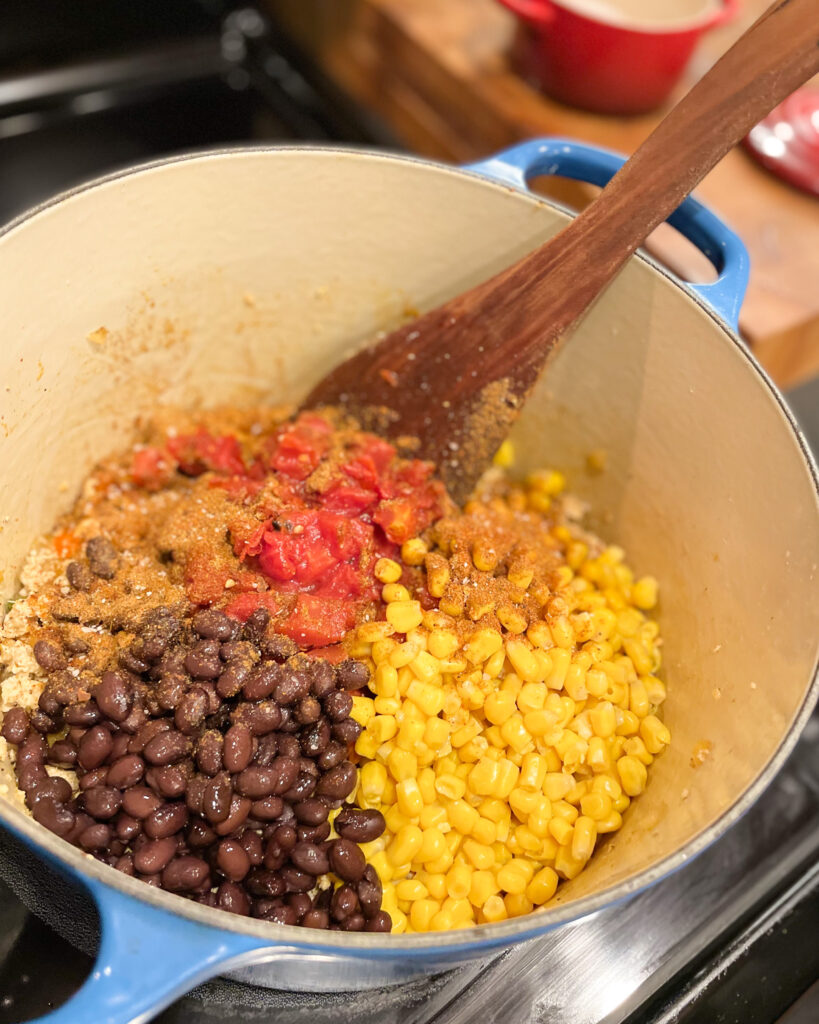
Add the onions, peppers and tomatoes. Add remaining taco seasoning and stir until vegetables softened, about 5 min.

4

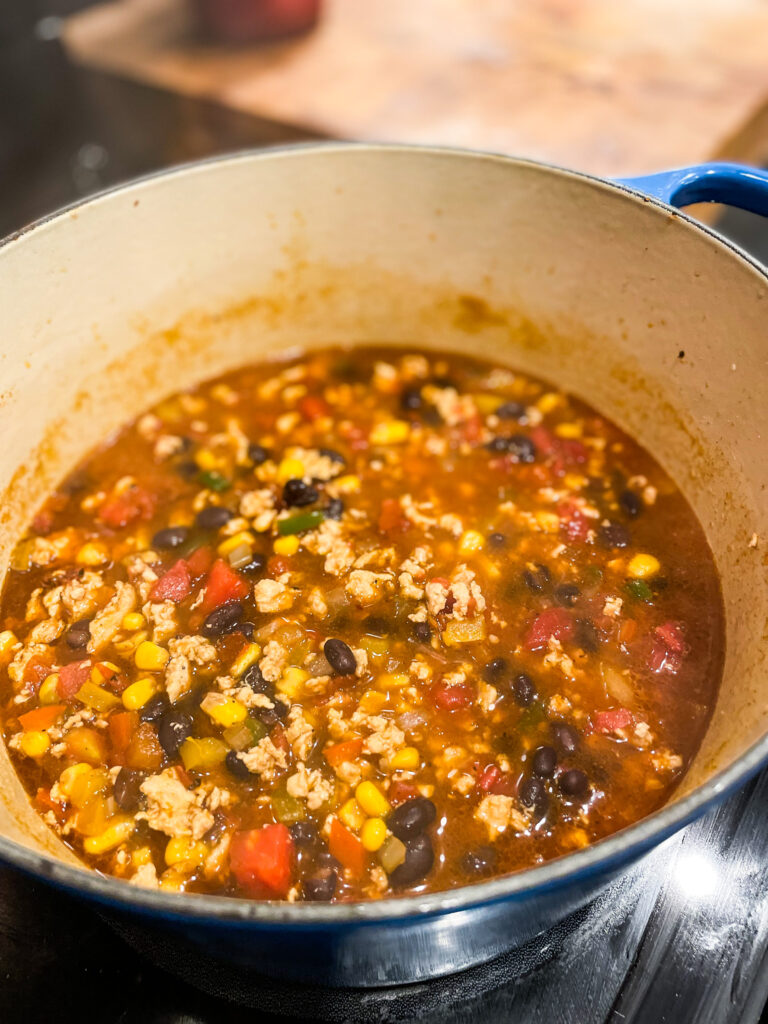
Add 3/4 of the black beans along with the beef broth. Bring to a boil then simmer about 15-20 minutes, stirring occasionally.

5

Add the remaining beans 5 minutes before done to keep some texture. (Can add all the beans at once if you prefer softer beans). Season with more salt & pepper as needed.

6

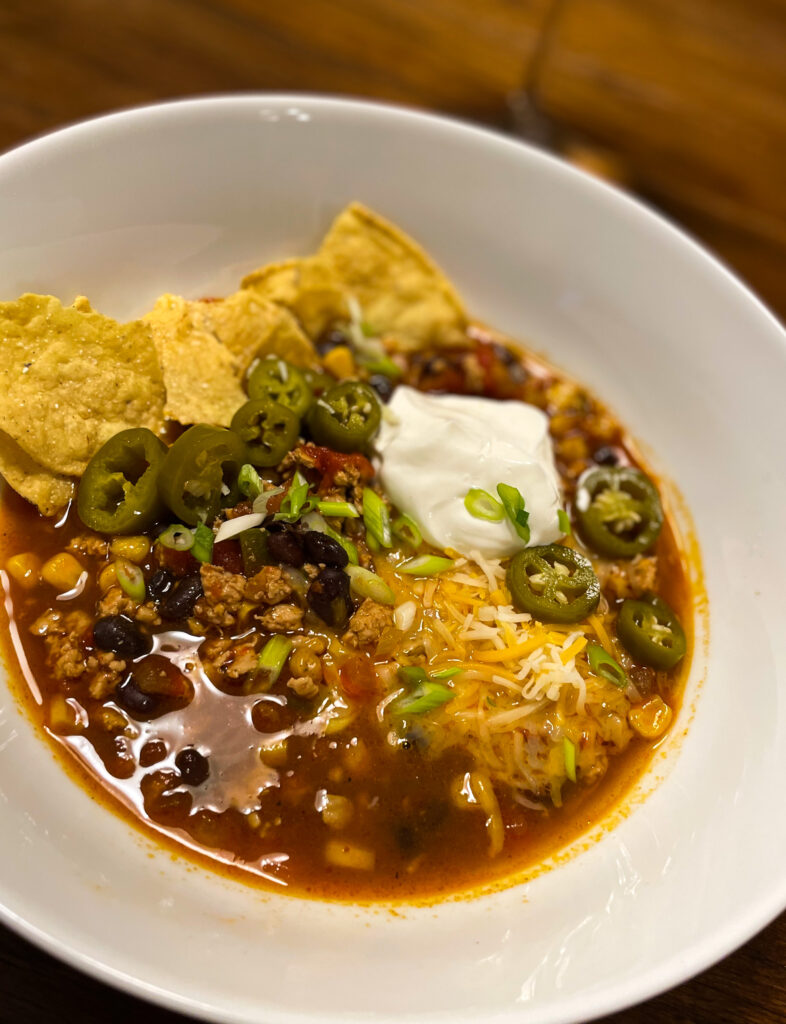
Transfer to serving bowl then garnish with fixings of your choice: cheese, pickled jalapeños, sour cream, tortilla chips, lime juice, cilantro….virtually endless possibilities! (Add toppings like you would a taco!) Enjoy!

7

Can keep in fridge for 4 days or freeze in freezer container up to 6 months.

Notes

I was out of any ground meat in my fridge or freezer. My husband likes to cook a lot of wild game so he happened to have some ground pheasant in the freezer, which worked out perfectly and tasted very good! This recipe is fitting for any ground meat you have on hand.

Comforting Curry Chicken Pot Pie

I’ve been wanting to make homemade pot pie for months now, especially as the weather has been changing to cooler times. Plus, being stuck at home more lately just begs for comfort food time.  I have seen several recipes for pot pies, even tried one from a Cooking Class we took through Zoom the day after Thanksgiving. Jeff as well has made a very tasty one using his wild Pheasant recipe which was very hearty and good. And while they all were delicious in their own right, when I found this curry recipe and tried it, I just KNEW this is the one for me.

This Curry Chicken Pot Pie speaks my soul language. Not only is it an easy recipe, but it is savory, warm, rich and has a delicate, flaky, melt-in-your-mouth crust that will keep you going back for more.  This can also be used with leftover chicken that you’re not sure how to re-use. Just need 2 – 2 1/2 cups of the cooked chicken.

Another great plus, once cooled, you can wrap in plastic wrap and foil, pop in freezer and have a busy-night meal any night of the week, just minutes away in the microwave.  I hope you enjoy this as much as I do!

Comforting Curry Chicken Pot Pie

Print Recipe
Serves: 4 Cooking Time: 60 minutes

Ingredients

  • 3 boneless, skinless chicken thighs, cubed (or 2 cups pre-cooked chicken)
  • 1 Tbsp vegetable oil
  • 8 Tbsp unsalted butter, divided
  • 1 Stalk celery, diced
  • 1/2 Vidalia (or yellow) onion, diced
  • 1 Tsp curry powder
  • Kosher salt and freshly ground black pepper
  • 1 Clove garlic, minced
  • 1 Cup frozen peas and carrots, thawed (if frozen ok, will warm quickly)
  • 1/4 Cup flour (plus more for pie crust)
  • 1 1/2 Cup Chicken Broth (low or no-sodium best)
  • 1/2 Cup whole milk
  • 1 Refrigerated pie crust
  • 1 Egg, slightly beaten with 1 Tbsp water
  • **Will need 4 ramekins (I used 9-ounce ramekins and a small cast-iron skillet, but recipe is for 4 of those ramekins)

Instructions

1

In large skillet, heat 1 Tbsp olive oil and 1 Tbsp salted butter over medium heat. Add the chicken thigh cubes, sprinkle with a good amount of salt and pepper. Then, add other spices such as paprika, garlic salt, etc for even more flavor, if desired. Cook until browned and transfer to bowl; set aside.

2

In same skillet, add vegetable oil along with 6 Tbsp unsalted butter and heat over medium-high heat. Add celery, onion, curry powder, good pinch of salt and black pepper, stirring and cooking until onions are translucent, about 7 minutes. Add the garlic, stirring and cooking for 1 minute then add the carrots and peas. Add the flour, stirring constantly for 2 minutes. Slowly add the chicken stock while whisking, then the milk, whisking constantly to remove any lumps. Bring to a simmer and cook until thickened, stirring frequently, about 5 minutes. Taste and add salt and pepper as needed. Add the chicken and stir to combined. Transfer the curry chicken into the ramekins.

3

Lightly dust work surface with flour. Roll out the pie crust large enough to cut out 4 rounds to top the ramekins. Using the ramekins as a guide, cut a little larger than the ramekins then carefully transfer to top off the ramekins, pressing around the sides to seal the edges. Use a sharp knife to cut 3-4 slits on the top for venting. Brush the top with the egg wash and place ramekins on baking sheet.

4

Bake until crust is golden brown and inside is bubbly, 25-30 minutes. Let cool slightly before serving (about 10-15 minutes). Divide up and add the remaining 2 Tbsp butter on top of crust just before serving.

Notes

You can always use rotisserie chicken if you’re not in the mood to cook the chicken yourself. Just pull apart the chicken (minus the skin) and chop to bite-size pieces.

Simple & Hearty Chicken Bolognese

If anyone knows me, knows how much I LOVE PASTA! Any pasta is good pasta in by book, so I am always looking for different ways to make all the different pastas out there. I’ve never used this noodle so it was new to me.  I do prefer using Whole Wheat pastas whenever possible but that was not an option currently where I live.  So if you have that available, use it to keep it even more healthy.  I found this sauce is perfect with this noodle as it just nestles right into the textured pasta, keeping every bite tender and flavorful.  Using chicken instead of beef does makes me feel more healthy eating it while still having that hearty feel to it. This Simple and Hearty Chicken Bolognese was inspired by Katie Lee on The Kitchen and it is a new Go-to pasta dish for me now!  I saved a few servings and stuck them in the freezer (can freeze up to 6 months) to heat up on a busy night this upcoming winter.  I cannot wait to eat it again! Enjoy!

Simple Chicken Bolognese

Print Recipe
Serves: 4-6 Cooking Time: 1 hr 30 min

Ingredients

  • 2 Tbsp Extra virgin olive oil, plus some for serving
  • 1 lb Ground chicken
  • 1 large carrot (or 2 small), finely chopped
  • 1/2 sweet onion, finely chopped
  • 2 cloves garlic, minced
  • 1 Tbsp chili powder
  • 1 Tsp Italian seasoning
  • 1/8 tsp Red pepper flakes, optional
  • 1 Bay leaf
  • One 6-ounce can tomato paste
  • One 8-ounce can tomato sauce
  • 1/2 Cup dry white wine (I used Sauvignon Blanc)
  • 1/2 Cup evaporated milk
  • 1 1/2 Tsp kosher salt, plus more as needed to taste
  • 1/2 Tsp freshly ground black pepper
  • 1 Pound rigatoni
  • 2 Tbsp fresh parsley, chopped
  • Grated Parmesan or Pecorino cheese, for serving

Instructions

1

Heat oil in large pot over medium-high heat. Add chicken, cooking and breaking up with wooden spoon until a browned, about 5 minutes. Add carrots and onions, cook until tender, 7-10 min. Add in a the garlic and seasonings with bay leaf, stir and cook for 1-2 minutes. Add the tomato paste and cook for 2-3 minutes to toast and brown a little on bottom of pot.

2

Stir in the white wine and cook for several minutes, until absorbed. Add the milk, stir constantly until cooked down and absorbed, about 3 minutes. Add the tomato sauce, salt, pepper and 1/2 cup of water (to loosen up sauce). Stir to combine, cover and cook on medium-low for 45 min - 1 hr, stirring occasionally.

3

Before cooking time is up, cook noodles to “al dente” according to box directions (be sure to salt your water when it comes to a boil, about 3-4 tablespoons of kosher salt, before adding the pasta to the water). Transfer cooked pasta to sauce with slotted spoon and stir to combine. Add 1/4-1/2 cup of the pasta water as needed if thinner sauce is desired. Garnish with parsley and serve with more red pepper flakes, if desired, and grated Parmesan or Pecorino cheese on top. (I also like to drizzle a little olive oil over the top just to finish it off).

Easy Homemade Basil Pesto

Our herb garden is in full bloom right now, so it is PESTO time! I absolutely LOVE Pesto on just about anything. It can be spread on toast, crostini, over fish, chicken or steak before cooking (to get a great crust) or after cooking, tossed with pasta or veggies, use it as a dip….there are endless ways to use it.  Tonight we spread it over our Italian-Style Turkey Burger Sliders (pictures included) which gave it that extra punch of flavor we just love. Plus adding this Pesto any of your food gives you a really great pop of flavor without having to use more salt, butter, mayo and other fatty condiments which we love but are not so good for our heart or waistline.

We did three batches today, but I’m sure more will be coming soon as our crop continues to flourish. First we made a basic Basil Pesto.  From this, you can add many different flavors to make it your own. Secondly, we made a Basil-Lemon Pesto which had a great bite of brightness with the acidity that I cannot wait to try on fish.  Thirdly, we made a Spicy Basil Pesto (featured photo) that we used tonight on our Italian Turkey Burger Sliders. I’m telling you, it took all the restraint I had not to eat the whole bowl just by itself. (variations of these pestos are at bottom in NOTES section).

With this recipe you can drizzle a layer of Extra Virgin Olive Oil over the top then store it in an airtight container or small mason jar in the fridge for about a week until ready to use. If you want to freeze it for later, just be sure to omit the cheese until you have defrosted it to use it (the cheese will make it rancid when frozen with it).  Place the prepared pesto in an ice cube tray until frozen, then transfer to freezer bag and use as needed. Hope you all enjoy this easy recipe!

Easy Homemade Basil Pesto

Print Recipe
Serves: about 3/4 cup Cooking Time: 10 minutes

Ingredients

  • 2 Cups packed fresh Basil Leaves, washed and dried well
  • 2 Tbsp Pine Nuts, toasted slightly (just a few min in saute pan on med heat)
  • 2 Cloves Garlic, peeled
  • 1/4-1/3 cup Extra Virgin Olive Oil (depends on consistency you want)
  • 2 Tbsp freshly grated Parmesan Cheese
  • Kosher salt and freshly ground Black Pepper, to taste

Instructions

1

In a food processor (or blender) combine the basil, garlic and toasted pine nuts and pulse until coarsely chopped, scraping sides down as needed.

2

While blending on low speed, slowly drizzle in the olive oil until smooth consistency.

3

Add the cheese, season with a few pinches of salt and several grinds of black pepper.

4

Blend until combined.

5

Use immediately, or transfer to airtight container or jar, drizzle a layer of olive oil on top and stick in fridge for up to one week.

6

Also can be frozen but omit cheese and add when defrosted and ready to use.

Notes

Lemon-Basil Pesto: Add the zest of one lemon along with its juice when adding the cheese. Spicy Basil Pesto: Add 1/8-1/2 tsp Red Pepper Flakes, according to your heat level and enjoyment.

California Mahi Mahi Fish Tacos

I am a California girl, born and raised through most of my teenage years (therefore ALWAYS will be), so nothing says “home” like fish tacos to me.  I crave them pretty often if I were to be honest about it.  I absolutely LOVE them and cannot always get that same authentic taste here where I live now. Don’t get me wrong, there are great Mexican restaurants here that have their own versions, but there’s something about this recipe I finally found that just brings me back to the California beach waves and summertime. There’s something about it’s simplicity yet bold in flavors that make it so darn good. I’m sure there is a debate out there somewhere about how the fish should be cooked, breaded, etc. But personally, I like mine just seasoned well (no breading) then grilled or pan-seared and served up with all the fresh ingredients.

Not only are they easy to make (less than 30 min!) but also very healthy.  Plus you can add whatever extras you want on top…cilantro, pickled red onion, fresh diced white onion, sliced radishes, avocado, slaw, spicy sauces…anything goes! (But to me, no matter what you add, a MUST is always a squeeze of fresh lime over each taco!). Yum!

Hope you enjoy these as much as my family and I have enjoyed them!

California Mahi Mahi Fish Tacos

Print Recipe
Serves: 4 Cooking Time: 30 minutes

Ingredients

  • 1 1/4 lb Mahi Mahi fillets (skinless) cut into 1 inch pieces (or any firm fish)
  • 4 tsp Chili Powder (can use Mexican Chili Powder for more heat)
  • 1 tsp Cumin
  • 1 tsp Smoked Paprika (or regular is fine)
  • 1 tsp Onion Powder
  • 1 tsp Garlic Powder
  • 1 tsp Kosher salt
  • 2 Tbsp lime juice (juice of 1 small lime)
  • 3 Tbsp Olive Oil
  • 1/2 Tsp freshly ground Black Pepper
  • 12 Corn Tortillas (store bought is just fine, recipe for homemade below)
  • Optional garnishes:
  • 1/2 cup chopped Cilantro
  • 1/4 cup sliced Green Onions
  • 2 sliced jalapeños
  • Lime wedges
  • Cilantro-lime cream sauce (recipe follows)

Instructions

1

For the Marinade: mix together the chili powder, cumin, paprika, onion and garlic powders, salt, pepper, lime juice and olive oil. Toss with the diced fish in medium bowl to coat and let rest 15 min. Meanwhile, heat cast iron skillet over medium-high heat.

2

Place fish in skillet (discard marinade) and let cook until seared (2-3 min). Carefully turn each piece, searing other side another 2 min.

3

Using metal or wooden spatula quickly turn and toss in the pan until fish is seared on all sides a few more minutes (careful not to move around too much, just toss once or twice, enough to try and get all sides seared, but ok if some sides are not as dark), cooking a total of about 7-8 minutes.

4

Place fish in warm tortilla and top with favorite toppings.

5

Notes

Cilantro-Lime Cream Sauce: Mix together 1/2 c. Non-fat plain yogurt (or sour cream) with 1/4 c. Chopped cilantro, juice of 1 lime, pinch of salt, dash of cayenne pepper. Mix well and serve over tacos as desired. Homemade Tortillas: Mix 2 cups masa harina flour (I used MASECA brand, pictured above) with 1 1/2 cups warm water by hand in large bowl for about 2 minutes, until you form a soft dough (adding a tsp of water at a time as needed, if dough is too dry and not coming together). Form 19 balls (about 1 ounce each) and cover with damp cloth to keep moist. Place a dough ball between 2 sheets of parchment/wax paper and flatten into round shape by using heavy, cast-iron skillet to about 5 in diameter (or use tortilla press if you have one, of course). Continue same with each ball, until all pressed out. Heat griddle on med-high heat. Slowly peel top paper from tortilla, lay tortilla in one hand and peel other side off slowly. Carefully lay tortilla onto hot griddle and cook each side 30-45 seconds. Keep stack of tortillas warm in oven, wrapped in kitchen towel as you go; keep warm until ready to serve.

Italian Sausage & White Bean Soup

This was one of the many inspirations I had seen on Food Network, just about the time of “The Great Quarantine Days” (so I call them). I spent my weekends finding ways to come up with make-ahead meals that would be easy for not only myself for lunch, but also quick dinners for the family if the days became long and exhausting.

This recipe I made is absolutely delicious! And exactly what I needed on this long Monday. Totally quick. Totally easy. And Totally comforting.  All I needed to do was bring it from freezer to fridge the night before, get home, heat it up and add freshly shaved Parmesan and fresh chopped Parsely.  Of course, had to also broil some garlicky-Parmesan bread to sop up all that juicy yumminess.  Or you can totally eat as is and it’s still perfectly scrumptious!! YES! This was one of my favorite make-ahead ever!

Easy for any busy mom or dad to do ahead (when you get a chance), then enjoy with just a few fresh items and a chilled glass of Rosé! Enjoy!

Italian Sausage & White Bean Soup

Print Recipe
Serves: 6 Cooking Time: 45 min

Ingredients

  • 2 Tbsp Olive Oil
  • 2 lbs Italian Sausage (sweet, mild, spicy, whatever you like!)
  • 1 Cup Jarred sliced Roasted Red Peppers
  • 2 Tbsp Fresh Oregano, chopped (or 2 tsp dried)
  • 1 Tbsp Fresh Rosemary, chopped (or 1 tsp dried)
  • (Or any a couple of tsp of any Italian dried herbs you have on hand)
  • 4 Cloves Garlic, minced
  • 1 Large Onion, sliced
  • Kosher salt and freshly ground pepper
  • 8 Cups low-sodium Chicken stock (or broth)
  • 2 (15.5 oz) cans Cannellini Beans (white kidney beans)
  • 2 (14.5 oz) cans Fire-Roasted Diced Tomatoes
  • 2 Cups Chopped Kale
  • 1 Cup Heavy Cream
  • 2 Tbsp Apple Cider Vinegar
  • 1-2 tsp Red Pepper Flakes (optional)

Instructions

1

Heat olive oil in large Dutch oven or heavy-bottom stock pot over medium-high heat. Brown the sausage, about 10 minutes, breaking into bite size pieces then remove to paper towel to dry. (Leave all the oil in pan!)

2

Add onions, peppers, oregano, rosemary, garlic to the hot oil and sauté until tender, about 5 minutes. Pour in the broth, beans and tomatoes, stir to combine. Return the sausage, bring to boil then reduce to simmer on low, uncovered, for 20 minutes.

3

Stir in the kale, heavy cream and cider vinegar.

4

Taste and adjust salt, pepper and red pepper flakes as desired.

5

Serve immediately with some shaved Parmesan.

6

To freeze: Transfer to freezer safe containers, leaving some room at time for expansion. Allow to cool to room temperature, cover and label and enjoy over the next 6 months!